
The idea 💡
A year back, we (at Dyte) felt that screen-sharing in online meetings was a barrier to effective collaboration. So, we decided to introduce Plugins - a solution to embed other applications within the meeting to make the experience a lot more immersive (check it out on https://app.dyte.in). Some of my favorite plugins are the YouTube plugin - which lets you watch YouTube videos together with other people in the meeting, and the Excalidraw plugin - which provides a whiteboard within the meeting for you to draw or doodle.
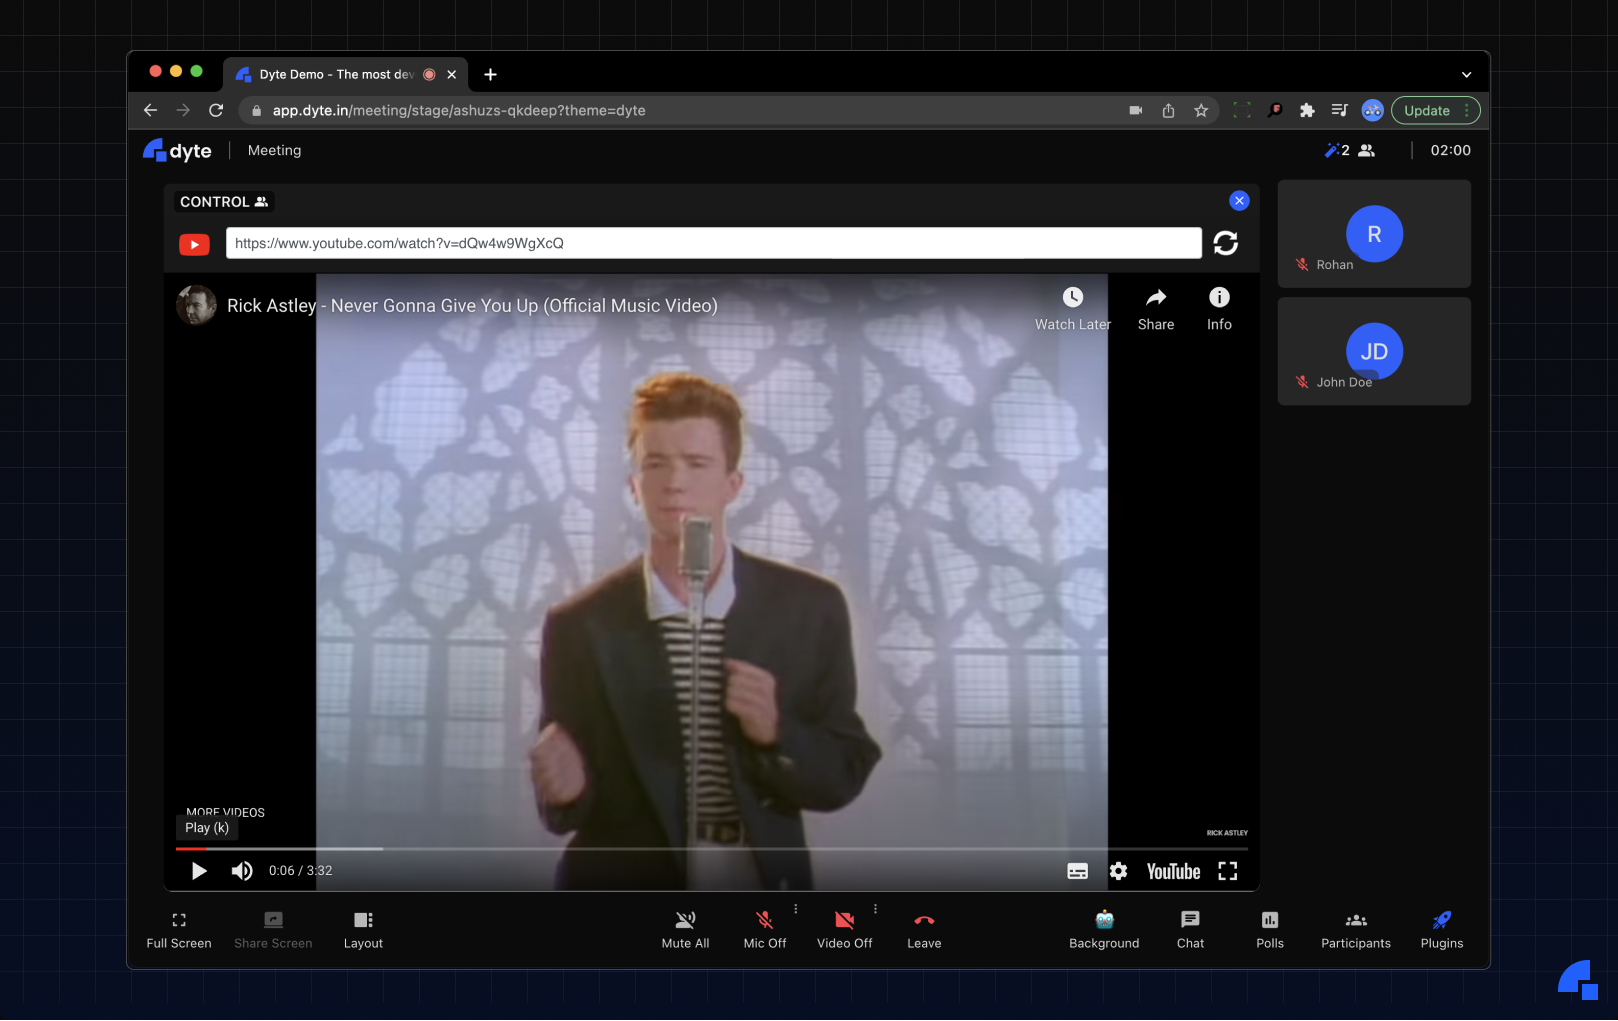
Now, you can perhaps think of a myriad of applications that you could integrate within your meeting and collaborate effectively. Typically, these would be web-applications performing a specific task really well. We, however, wanted to take it to the next level. What if instead of just being able to watch videos with your friend, you could do anything on the web together? This interesting thought ushered in the creation of the Remote Browser plugin.
The objective of the remote browser was simple, instead of solely sharing documents, images, videos with people in the meeting, we wanted to share entire browsers. In this way, users would not be bound by the limitations of a web page to unlock their full collaborative potential. We wanted the experience to be akin to being physically at a place with the people and surfing the internet on a computer.
The challenge
We had an idea that sounded good on paper, but the real challenge was coming up with a plan for implementing it. We would require our application to be hosted on a remote server, and we should be able to communicate with it in real-time. Just to be clear - we were not the first to think of this idea. There are existing implementations of hosting browsers on remote servers on-demand, but we wanted a fast and scalable solution. We wanted the experience to be seamless - with minimum start-up time and lag. Also, since one of our core ideologies at Dyte is customizability, we wanted the browser to also be configurable, i.e., there should be a way to dynamically control what sites can be opened on the browser, or which website opens when a new tab is opened.
Essentially, our challenge boiled down to finding answers to these questions:
- How do I view the interface of a browser that’s running on a remote machine without physically being there?
- How do I reduce the duration for spinning up a new browser when a user requests for one?
- How do I ensure that I’m not introducing some security risks by running a browser on my server?
- How do I allow meeting administrators to control the content viewed on the browser, especially after it has been deployed?
The solution 👨💻
Now that we had defined the problem better, we could finally make decisions regarding the technical implementation.
Remote Access 🎮
We stumbled upon the answer to the first question quite fast - VNC (we kind of already knew we were going to use VNC but a little research never hurt anyone). Just in case you haven’t heard of VNC, it’s a cross-platform screen sharing system that was created to remotely control another computer. It is the technology that powers tools like AnyDesk. It uses a network protocol called RFB (Remote Framebuffer) in order to transmit pixel data (mouse movements, clicks, keystrokes) from one computer to another.
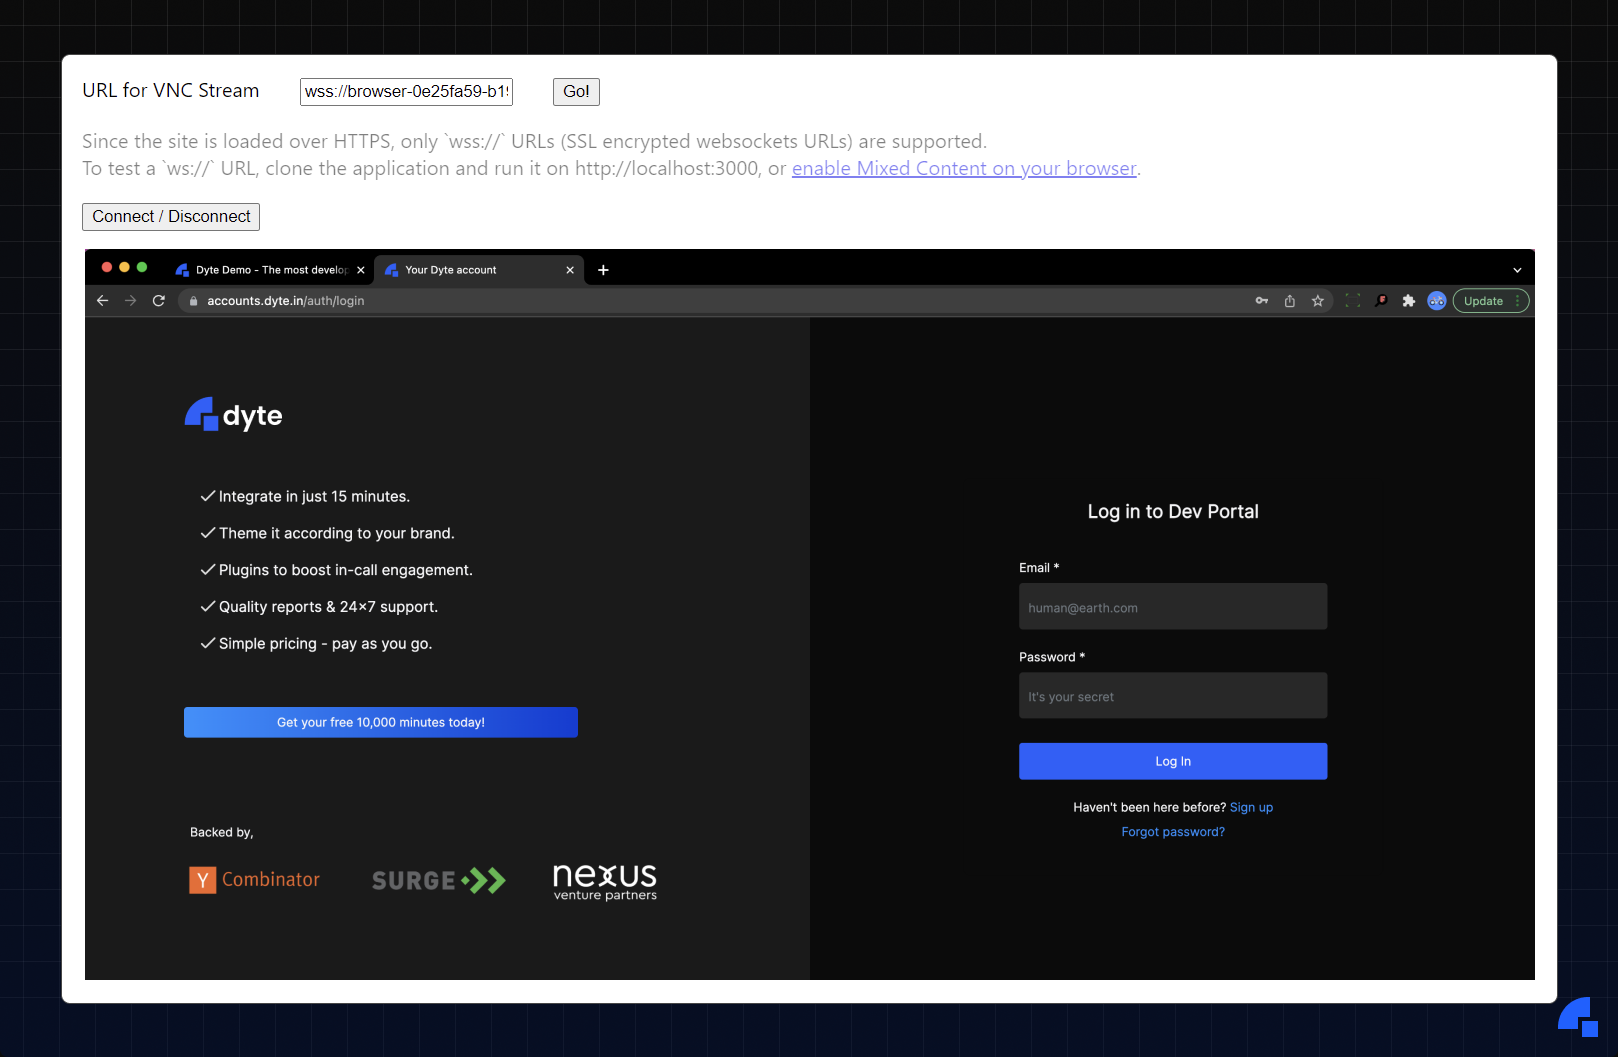
Once we had finalized that we were going to go with VNC, we started looking into tools using which we can convert a VNC stream into a WebSocket stream that can be processed on a web page. https://github.com/novnc/noVNC seemed to be the obvious choice here, based on its popularity, developer-friendly API, and well-written documentation. Now, we could run the noVNC websockify server alongside the browser, and we would receive a WebSocket stream on the client-side.
We built a Docker image that runs Google Chrome, https://github.com/LibVNC/x11vnc server, and noVNC websockify, and exposed a port on it, using which we could access the WebSocket stream. Then, using the example web page provided by noVNC, we could view the browser’s interface that was running inside the container!
Our client-side application was going to be built using React, but we weren’t able to find a well-maintained React wrapper library for the noVNC web client. So, we decided to make our own component library - react-vnc (sorry, shameless plug :p). After a few days of development, we were successfully able to view the browser WebSocket stream using the React library as well.
Finally, we were able to view and control the browser running on the server using VNC on our web application! With a single browser setup working, we moved on to the next challenge - scaling.
Seamless Scaling ⚖️
Since the Docker image was quite large, we could only run a few of those on a single server, and even those took about 10-15 seconds to spin up. If we had to allocate a new server where the image wasn’t present, it could even take between 15-30 seconds. We had to drastically reduce this spin-up duration for a better user experience. So, we structured the browser in the following manner.
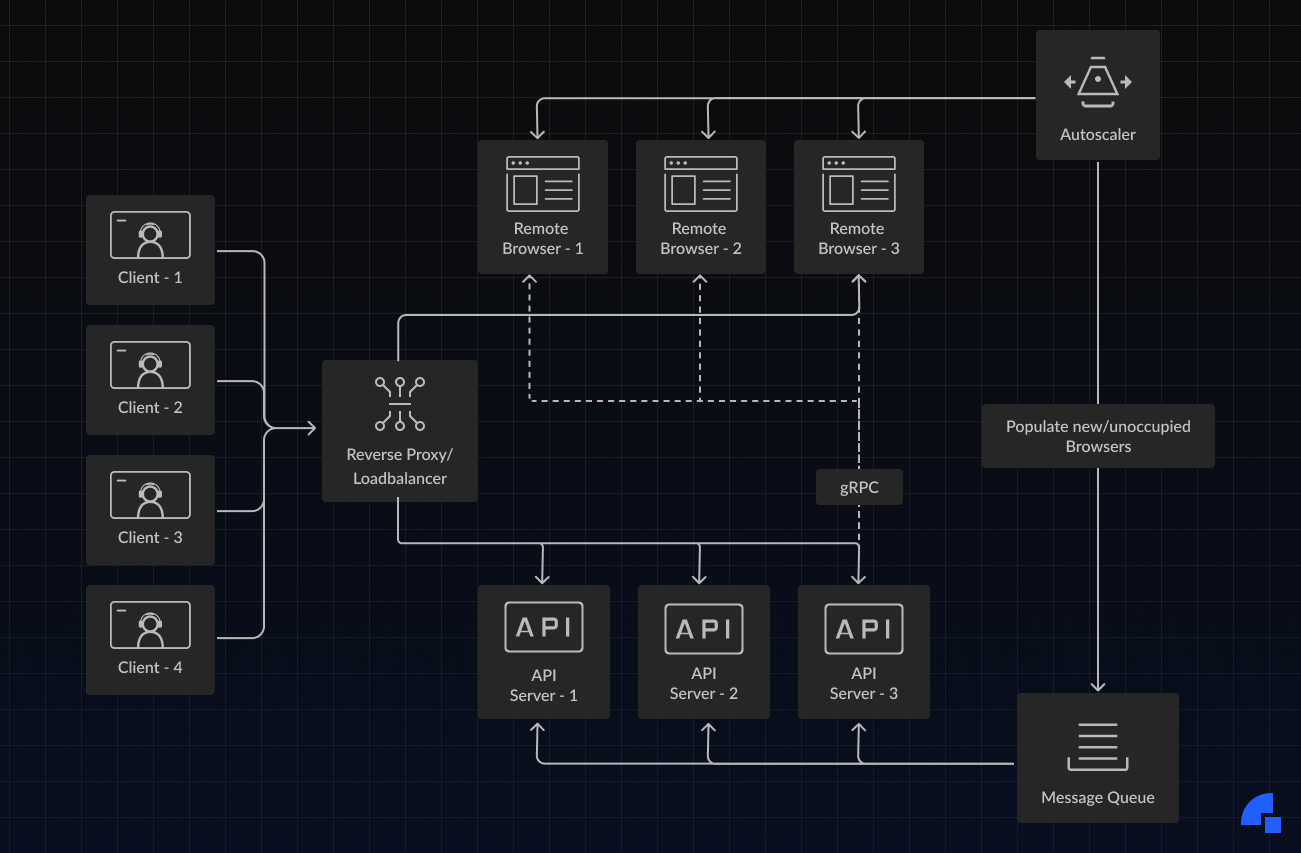
The system’s design is simpler than it looks. Here are the components:
- Client: This is the client application built with https://github.com/roerohan/react-vnc.
- Reverse Proxy: This routes the network requests to the right service. This service can optionally act as a load balancer between multiple API servers.
- API Server: This runs the backend routes for provisioning and deleting browsers. A pool of ready browsers is maintained in the message queue, and information about the browsers is updated on the API servers.
- Message Queue: The purpose of this is to store and update information about newly created browsers. This also informs the API Servers about the browsers currently unavailable so that they don’t get reallocated while they’re being used.
- Autoscaler: The autoscaler service is responsible for analyzing the load and spinning up new browsers or deleting them. This optimizes the cost of running browsers (P.S. it’s really costly) and also ensures that enough browsers are available when there are usage spikes.
- Browser: This service runs the browser itself, alongside a gRPC server to communicate with the backend. This gRPC server can later be used to update browser configuration, reset browser state, etc.
Reliability and Security 🔒
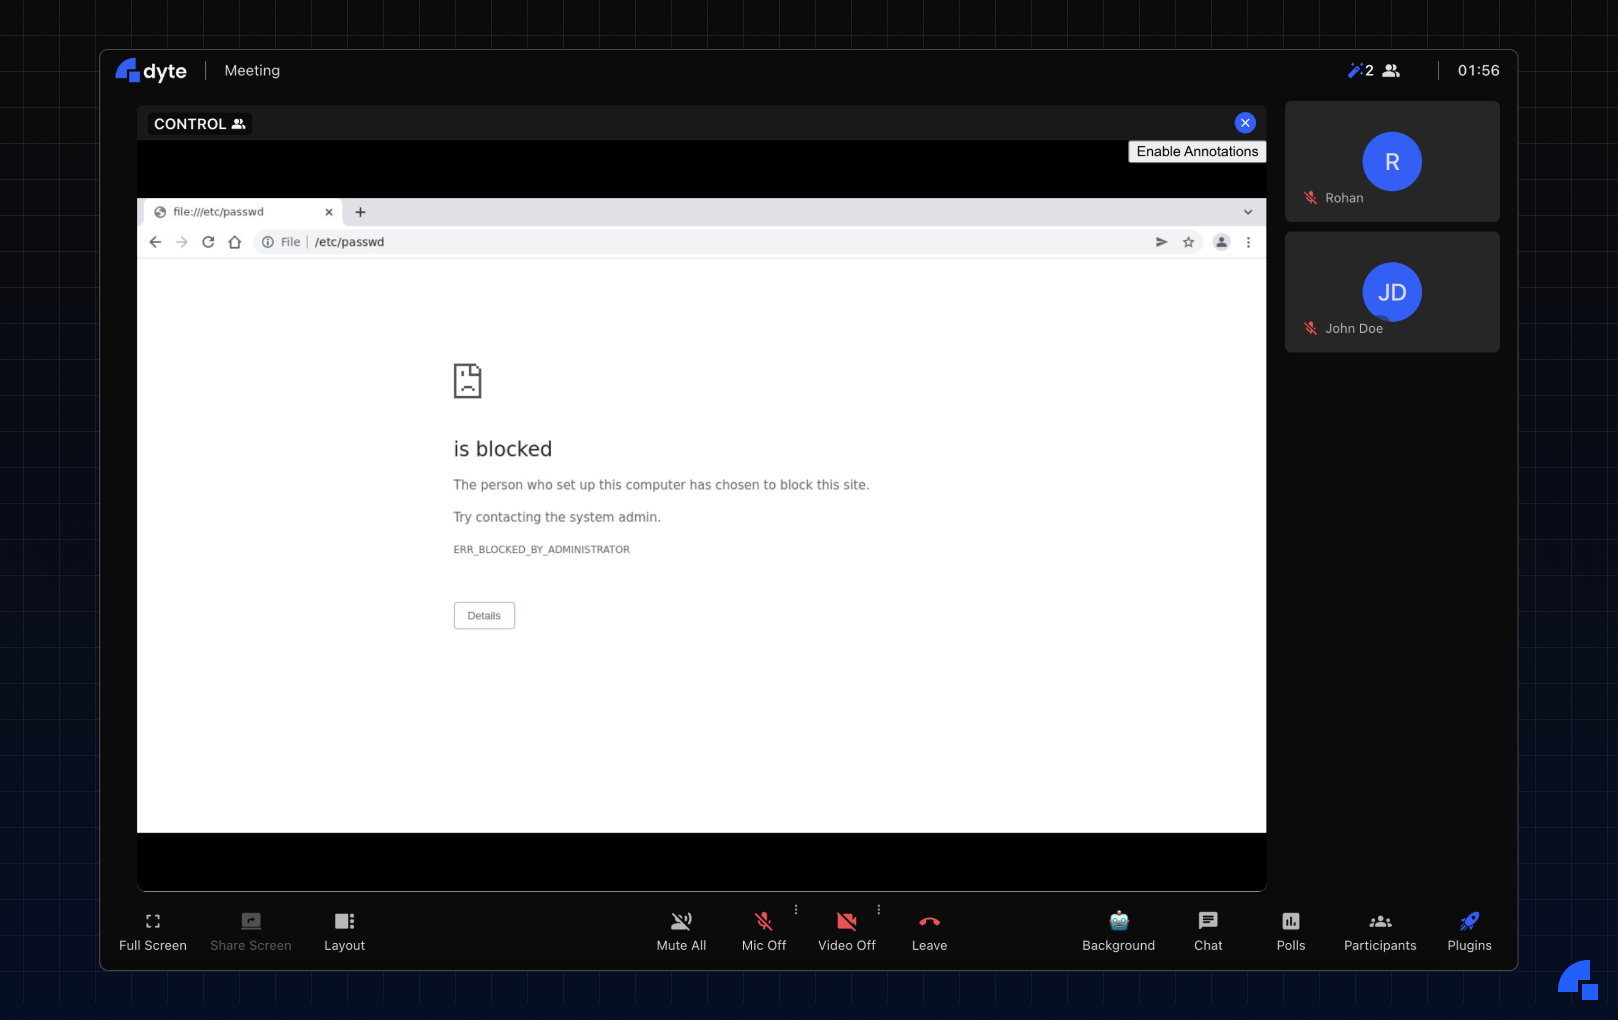
We spent the next month writing code and terraform files to get this architecture up and running. Once it was up and running, we had to see how we could break this! The browser was running on our internal network, and since it’s a browser, we couldn’t even disable outgoing requests. This means that anyone using the browser can request any internal IP with the help of the browser. For example, one could enter the URL https://169.254.169.254 (AWS Metadata URL) and get private information about the instance, security credentials, etc. We blocked certain private URLs like these using iptables, and properly configured the VPC/subnet to ensure that we weren’t leaking any private information.
We also blocked file:// URLs on the browser so that users don’t get access to any of the files in the Docker container’s filesystem (even though there would be no private information inside the Docker container, it was just a precautionary measure). Finally, we set up some automation to regularly update the Chrome version, just in case someone found RCE in the existing Chrome version :).
Customizability and Access Control 🖌️
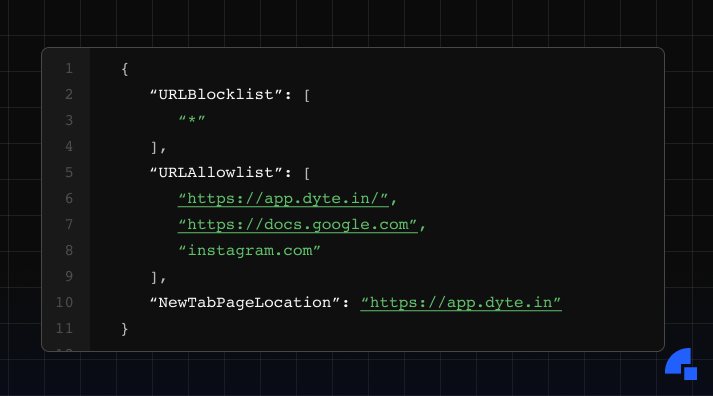
Our major concerns of availability and reliability had been dispelled. Now, we had to look into the customizability aspect. In the architecture discussion, I mentioned that we had a gRPC server running on the browser, which can easily be used to perform actions on the browser! We exposed routes on our backend to reset the browser, update its configuration, open a new tab, etc. These routes would request the gRPC server through the internal network to perform these actions. We used Chrome’s configurations to set up an allow-list and a block-list. We also allowed users to setup up the browser’s homepage, and the URL it visits when a new tab is opened (read more here).
Closing Remarks 📕
After months of architecture discussions, feature development, and bug fixes - we successfully had a relatively stable Remote Browser plugin up and running.
Of course, the browser gets deleted after the meeting ends - implying that you will be logged out of any accounts that you were signed into; and we do not store or log anything that you enter in the browser. Head over to https://app.dyte.in to experience a new paradigm of collaboration with the Remote Browser plugin.
If you haven’t heard about Dyte yet, head over to https://dyte.io to learn how we are revolutionizing live video calling through our SDKs and libraries and how you can get started quickly on your 10,000 free minutes which renew every month. If you have any questions, you can reach us at support@dyte.io or ask our developer community.


